
Bright Lamp Head But Dim Road Surface? Key Tips for Sourcing All-in-One Solar Street Lights

Many buyers judge solar street lights only by how glaring the lamp head appears up close, assuming bright fixtures equal good road lighting. This is a common procurement misunderstanding.
Light is only valuable when evenly cast on roads, yards, factories and parking lots. Poor lens distribution often leads to bright spots directly under poles with dark edges or distant shadow zones, no matter how impressive the product specs read. When selecting lamps, ignore studio close-up shots and LED bead counts; prioritize real illumination coverage, mounting height, road width and pole spacing instead.
1. Ground Illuminance Matters More Than Lamp Head Glare

Nearly all lights look dazzling at short range, yet glare cannot guarantee usable brightness for different scenarios:
-
Roads: Even pavement visibility
-
Yards: Full coverage of activity zones
-
Factories: Clear passages and work areas
-
Parking lots: Balanced light for cars and pedestrians
-
Rural lanes: Safe night travel vision
Most low-quality lights suffer uneven light output: bright only right below the pole, narrow beam range, or obvious dark sides.
A simple formula explains core logic: Average Illuminance (lux) ≈ Luminous Flux (lm) ÷ Illuminated Area (㎡) Take a 100W lamp with 180 lm/W efficacy as an example: Total flux = 100W × 180 lm/W = 18,000 lumens
-
120㎡ coverage: 150 lux
-
240㎡ coverage: 75 lux
Wider coverage directly reduces ground brightness. Real performance is further affected by lens design, installation angle, light loss and road reflectivity.Trust these credible evaluation references rather than marketing slogans: Real night installation footage, field project photos, beam angle distribution, and lighting effects under different mounting heights. Authentic on-site test results beat all "ultra-bright" labels.

2. Installation Parameters Decide Final Lighting Effect


The same lamp delivers totally different results under different setups:
Mounting Height
-
~3m: Bright local light, for small yards & narrow footpaths
-
~4m: Balanced brightness & range, for rural community roads
-
5–6m: Wide coverage with lower ground lux, for factory roads & parking lots
Over 6m: Requires high-power LEDs, upgraded lenses, larger solar panels and batteries
Road Width & Pole Spacing
-
3m narrow lanes: Standard configurations work fine
-
5–6m roads: Need wide-angle uniform light distribution
-
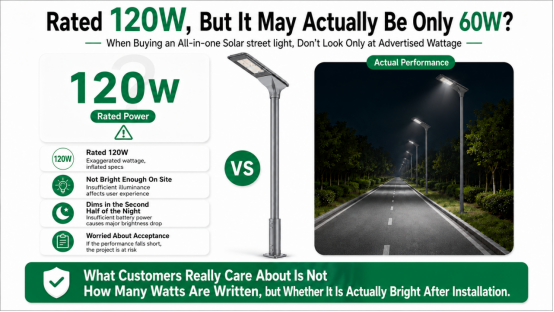
6–8m wide roads: Nominal 120W cannot meet demands alone
-
Pole spacing >20m: Easy to form dark gaps between lamps
Example: One lamp performs perfectly at 4m height on a 3m path, but dims on road edges when mounted at 6m for a 6m-wide carriageway. Increasing pole spacing from 15m to 25m also creates shadow zones without sufficient beam coverage.
Before purchasing, confirm your exact project conditions: road width, mounting height, pole distance, lighting area and required working hours. Matching lamps to site data avoids post-installation brightness defects.
Conclusion
Do not evaluate solar street lights based on how bright the lamp head looks. The core standard is even, full ground coverage without heavy dark zones.
A fixed 18,000-lumen source produces lower lux over bigger spaces; identical fixtures vary drastically at 3m, 5m and 6m heights. Wider roads and longer pole gaps also raise higher requirements for lighting performance.
Always verify mounting height, road width, pole spacing, beam coverage and real night test effects during procurement. The ideal solar street light for your project is not the dazzling one up close, but the fixture that provides consistent, clear and wide ground illumination after installation.